Ok so it is not brain surgery
BUT there are a few things that can be pit falls and mar an other wise good job.
TRUST ME – I have DONE THEM ALL!!So here I am going to do a wee "step by step" with pictures (pretty Flash eh!?!) on the “how to” of replacing the pages. If you do these steps carefully, theoretically you should get a good job each time.

Ok then, here we are at step one.
You may think at first glance that this would be all you would need in order to change the paper over in your book but you’d be
WRONG. Hell yes you can do it this way but it is dodgy and there is every reason that you may stuff it up.
You will also need some small clamps. Failing this get someone else to help you. Someone you can
TRUST to hold stuff together and down without moving it.

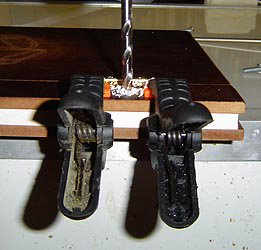
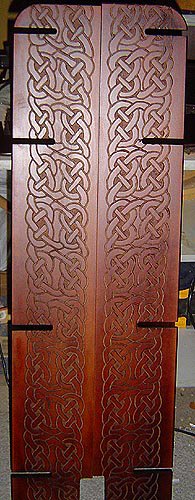
Here you can see the sort of clamps I mean. They are small and you can get them at any two dollar shop or Big W – they are cheap and you should make sure you get four of them. Also take care that the workspace is nice and flat. You can see here that the border on mine is flat aluminium bordering and that is perfect. Easy to clean and flat with no ambiguous bumps. It is also worth having two bits for your drill. Certainly have the one that fits the bolt holes – but also if you are not too sure about your drilling prowess get a teeny thin one for guide holes.

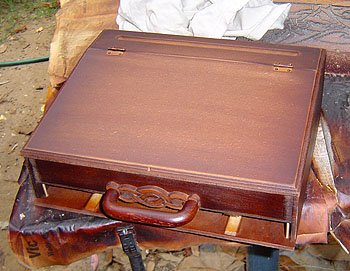
Step two is the easy bit. Unscrew the bolts and lay out the whole piece as you see it here. This way you can’t loose bits and it is all clear. This may not seem too difficult but you’d be surprised how quickly bolts and nuts roll off the bench, get lost in the dust, go in the wrong holes – whatever! If you get into the habit of a clean and ordered workspace it will help you a lot.
Step Three.

Now that everything is clean and clear, open up your paper and lay it out on the back piece as show. This is the first reason why everything has to be clean and orderly. You are dealing with whatever nice paper you have decided to put it there and nothing will ruin that quite like getting grease or dirt all over your papers.
Lay it flat as shown and see to it that there is a bit of an equal border between the edge of the paper and the top of the back. Ensure this for the bottom also.

Here you can see why this is necessary. The book cover is made bigger than A4 so as to protect the paper inside. If the space around the paper at top and bottom is not equal it looks
STUPID and
WE DON’T WANT THAT!
Also note the next step is to put the front cover on. Do ensure at this point that you have put it back together correctly. All the bolt holes should be on the same side. There can be little worse than redrilling only to find that because you haven’t put it back together right you have drilled through the wrong side of the cover!! (And
YES I HAVE done this!!)
In this case make it the bottom. Jiggle it a bit to ensure the paper sits flush at the spine and all together as you see here. It also must remain equally spaced at top and bottom. If you have a flat surface as I have it helps make sure that the paper sits flush and all in one form. Nothing worse than having pages in the middle misaligned!

This is what I mean. You can see between this and the previous picture that the cover has been replaced properly, the paper is flush at the spine and has been spaced at the top and bottom correctly. If you get that spine flush it gives a lovely look and helps with your re-drilling
IMMESURABLY.
It is worth taking your time to get this right. Re-do as many times as necessary for you to be happy with it.
The next step is to clamp it. Put one clam either side of the bolt hole taking care that all your hard work lining it all up doesn’t slip away. If you place one clamp either side it gives you the maximum amount of stability and you will want it when you are drilling. Once you have clamped it – check that all your lining hasn’t gone awry. Check also that the paper hasn’t slipped on itself and is now uneven somewhere. (This often can occur in the middle and as we have already explores … make it look
STOOPID!)
Ok here we go – time to start drilling!!
Now I have mentioned this before. If you are unsure as to your ability to just drill straight on through and perfectly match both sides, use a small tiny drill bit to put some guide holes through. What this means is that if you place the drill bit right in the center of the bolt hole it will give you some room all the way round. Hold your drill firmly and upright and allow the weight of the drill to push the bit down. Drill through to about half way and then flip the book over and drill through from the other side. This way you have a
MUCH reduced chance of going off at an angle and through the cover on the far side or simply making a hash of it!
(And
YES AGAIN – I have done this one much to my dismay on a finished item. It gives two overlapped holes on the far side and looks…? You guessed it! It looks
STOOPID!!)

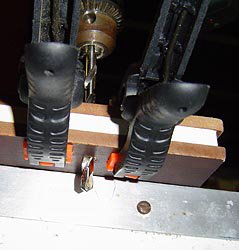
One thing to watch out for in using the smaller drill bits it that with all that extra space it is easy to move just a bit and before you know it you are drilling down
RIGHT BESIDE the edge as you see here. Ok so it will only be a small hole and with the bit at that size it is more than likely to correct itself on the other side when it hits the wood BUT I ASSURE YOU … the one time you don’t want it to mess up it WILL mess up – so don’t get into the habit of it! Get into the right habits in the first place and you will be grateful in the long run that you did.
Ok so you have your small holes nicely in the center and you have checked out both sides to make sure it goes all the way through to where it should … what now?

Well this is where you get the drill bit that fits the hole. Lock it in and check everything. This is another reason that the small guide holes are useful. If you have them nice and centered, then the tip of your proper size bit should sit in it nice and snug. It should bite into the paper properly with a minimum of mess and disturbance to the way it sits in the cover and there will be a lesser chance of the bit slipping out and scoring a ruddy great line across your lovely finish. (You would not BELIEVE how crap that looks – or how irritatingly difficult it is to sand back and fix properly!!)
You can see here how important the clamps are to stability, how important a good straight vertical drill is and why you let the weight of the drill do the work. All this ensures a good even descent that goes where it should and disturbs as little as possible so that there is no unwanted movement between page and page or page and cover.

Ok now you will be tempted at this stage to take the clamps off –
DON’T!!! Drill each hole one at a time and leave the clamps where they are!!
Carefully blow away any slough and check the piece and the holes. When it is clear and clean you may proceed to put the bolt in. It is ok to simply let it sit in the hole – it will keep everything where it should be.

When you have put the bolt in,
THEN you can drill the second hole. Place the second bolt in – leaving the clamps well alone. These clamps are the only thing that stands between you and and the odious chore of having to fit every sheet singly. This is
NOT recommended!!
If the clamps aren’t holding it together then the pages can fall out and you will have to put them in one at a time because there is literally no way on heaven or earth that you will be able to line all the raggedly drilled pages up adequately to get them back in any other way. I have tried.

Now here is another really basic tip that is invaluable. Leaving the book where it is, carefully remove the clamps from around ONE of the bolts. Place the nut on your finger as shown and then use the screwdriver to join the two. You may be tempted to pick the book up – DON’T the bolts fall out and we are back in the wonderful world of “Oh Crap”. Just use the screwdriver and they will go together. Screw it nice and tight.

Again you will be tempted to pick up the book. DON’T.
Having done one of the bolts, do the other in the same fashion. Only when both are nice and tight should you pick up the job to drool over …. Oops I mean inspect it.


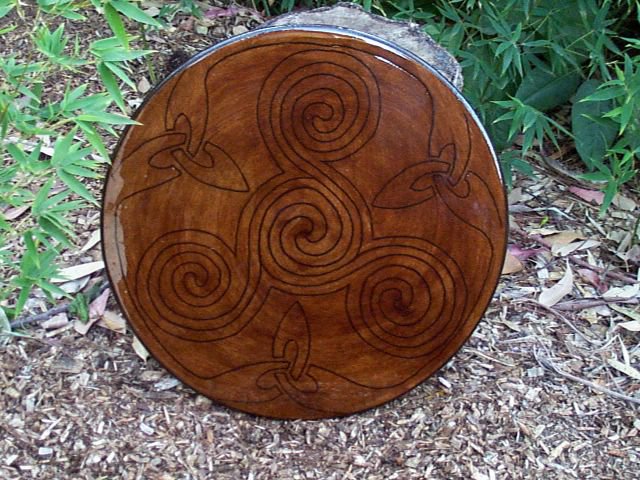
 And last but certainly not least a funny wee notebook doodad which my three year old son thinks is the bees knees .....
  For those sticklers I will also be working up a range of others.
 And last but certainly not least a funny wee notebook doodad which my three year old son thinks is the bees knees .....